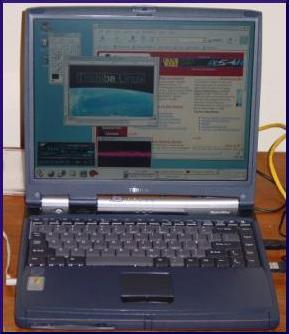
Toshiba Satellite 1005

Toshiba Satellite 1005

RedHat Linux 7.2 Installation


This web page chronicles my installation of RedHat version 7.2 on a new Toshiba Satellite 1005-S158 laptop computer. The Toshiba 1005 series of laptops can be purchased (as of March 2002) for around $900 U.S after rebate offers, which makes them a very good deal for all of the features. It is part of the Satellite 1000 series that also includes the 1005-S157, 1000-S157 and 1000-S158. All machines are very similar (the S157 vs. S158 designation seems to only indicate which version of Windows XP is installed), so instructions found here may work with the other three models.

Toshiba 1000 Series Specifications
Processor
Mobile Intel Celeron 1.06GHz, 256KB L2 Integrated Cache
Chipset
Intel 830MG
Memory
256MB SODIMM, PC133 SDRAM, 3.3V (expandable to 512MB)
Hard Drive
15 GB Toshiba MK1517GAP
Floppy Drive
Modular 3.5" 1.44MB
DVD-ROM Drive
Modular DVD-ROM drive
Graphics Adapter
Intel 830MG 8MB integrated controller
Monitor
14.1" TFT LCD
Modem
Toshiba Lucent/Agere AMR integrated V.90/56K winmodem
Sound
Crystal CS4299-A Codec
PC Card Support
Two 32-bit CardBus ready PC Card slots, supports 2 Type II or 1 Type III PC Card.
External Ports
Three USB ports, 1 ECP parallel port, 1 RGB port.
Sound Ports
Headphones, microphone (input), line (input)

Background

The Toshiba came with Windows XP Home Edition installed on one NTFS partition that covered the entire hard drive. Since I occasionally need Windows access, I decided to keep Windows XP installed and install Linux on a separate partition. Looking at the specifications, it appeared that Linux should work well, with the possible exception of the graphics card and modem. I already had a Linksys Etherfast 10/100 PC Card (model PCMPC100) from my old NEC 486 laptop that I wished to use for network connectivity. I also purchased a Targa optical travel mouse, since using the touchpad can be trying at times (I wasn't a good finger painter in pre-school). Although the instructions below are for RedHat, reading through them may give some hints that could help installation of different Linux distributions. Note also, that while the instructions below are fairly detailed, they are not comprehensive. I am assuming you have a little Linux experience. See the RedHat Install Guide if you want more detailed instructions on each step.

Preparation

I began by making sure any files I needed from Windows were backed up, just in case. I installed Partition Magic 7.0 under Windows XP so that I could repartition the hard drive without reinstalling Windows. If you don't want Windows on the machine, you can skip the next section and repartition the entire hard drive using the RedHat install.

Repartitioning the Hard Drive with Partition Magic

As stated above, I used Partition Magic 7.0. I am not aware of any free utilities at this time that allow repartitioning of existing NTFS partitions. Using Partition Magic I created a 5GB partition for Linux, 300MB partition for swap, and a 1GB FAT32 partition that can be seen by both Windows and Linux. Linux support for NTFS file systems is not complete, so I wanted a partitition that could be used by both in case I needed to transfer files between dual boots. Windows had about 8GB left after Partition Magic did its job.

Starting the RedHat 7.2 Install

I installed using RedHat CDs, burned from RedHat 7.2 ISOs. This is probably the easiest way to install, although you could also install from hard disk (if you have a partition that is readable by Linux - NTFS won't be) or over the network if you have a supported network adapter.
  1. Put the DVD-ROM drive into the laptop module bay.
  2. Insert the RedHat CD 1 into the drive and reboot.
  3. Press C when prompted to force booting from the CD.
  4. Press Enter to use the normal RedHat intall.

Initial Settings

Listed below are the basic install settings I used on my machine, you may want to make minor modifications.
  1. Language Selection: English
  2. Keyboard Configuration: default
  3. Mouse Configuration: ALPS GlidePoint (PS/2) (I didn't have the USB mouse plugged in at this point)
  4. Install Options: Laptop

Partitioning the Hard Drive

Select Manually Partition with Disk Druid when prompted. Partition Magic had already formatted /dev/hda7 (the 5GB partition to be used for Linux) as ext2. I wanted to use ext3, so I selected ext3 and selected / as the mount point. I made sure the swap partition was correct and left the Windows partition and 1GB FAT partition alone.

Boot Loader Installation

I chose to go with GRUB, and would recommend it since it has worked well for me. Install the boot loader in the Master Boot Record. I selected the Windows XP partition and gave it a user friendly boot label of Windows XP and then made sure the Linux partition was the default boot image.

Network Configuration

I had my Linksys Etherfast 10/100 PC Card (Version 1) inserted during install, so the RedHat install process detected it and asked for a network configuration. Note if you have the Linksys Etherfast 10/100 Version 3 PC Card, you will need to obtain and install the latest  Linux PCMCIA Card Services services, since the version that comes with RedHat 7.2 isn't recent enough. Enter the appropriate values for your network. If this is a company machine, see your system administrator for network parameters.

Firewall, Language, Time Zone, Accounts and Packages

Choose whatever firewall settings you need. I went with Medium and selected ssh and www as protocols that should be allowed in. Choose the appropriate Language Support (English-USA for me) and time zone (I happen to be USA Central time zone). Choose your root password and set up any regular user accounts. Finally, select any extra packages you would like installed.

XFree86 Installation

XFree86 4.1.0 comes with RedHat 7.2. Unfortunately the Intel 810MG graphics chipset used by the Toshiba is not directly supported. XFree86 4.2.0, which should be included in the next release of RedHat, does have direct support. There is, however, an acceptable workaround at the Intel Support Site (see the VESA-only mode section on their website and the X Windows Continued section below). To properly install, select the Intel 810 chipset and choose 8MB of video RAM. I chose not to skip X configuration.

Installation Continues

The main part of the installation should commence, formatting any drives and installing any packages. When asked to create a boot floppy, I hot-swapped the floppy drive module for the DVD-ROM module to write the floppy, and then hot-swapped the DVD-ROM drive back without any problem.

X Configuration

  1. Select Generic Laptop Display Panel 1024x768.
  2. Select 16-bit color depth.
  3. Select 1024x768 screen resolution (don't test the settings).
  4. Select your desktop enviroment (I chose Gnome).
  5. Select Text login type (this is important).

Initial Install Completion

Finish installation and reboot. You should see the GRUB (or LILO) boot menu. If you kept a Windows XP install, select that to make sure Windows will still boot. I had no problems. Reboot Windows and select Linux. You should see the spiffy Linux console as it spits out all kinds of initial booting information. The console will appear in the middle of the screen, since by default it is 640x480 and the LCD screen is 1024x768. Finally the login prompt should appear. If it does, congratulations, initial install is complete. However, there is still some work left to get everything running properly.

Console Size

As mentioned in the previous section, the default console will be 640x480, so it will not take up the full screen. To resize the console if you are using GRUB, login as root and edit the /etc/grub.conf file, adding vga=0x317 to the end of the kernel line in your RedHat linux section. So, assuming you have the stock kernel, the line will look similar to (/dev/hda7 may be different for your machine):

kernel /boot/vmlinuz-2.4.7-10 ro root=/dev/hda7 vga=0x317

If you are using LILO, add vga=0x317 to the append line (or create the append line if it doesn't exist) in your /etc/lilo.conf file. An example global section lilo.conf entry would be:

append="vga=0x317"

After your next reboot, the console should take up the entire screen (spiffy!). Thanks to Aradia for the tip.

X Windows Continued

Following instructions on the Intel Support Site (see the VESA-only mode section), login as root and edit the /etc/X11/XF86Config-4 file. In the "Device" section, change the Driver entry to "vesa". Comment out the Option "dpms" line in Section "Monitor" - if you don't do this, the X server crashes quite a bit. Hopefully the XFree86 4.2 release will correct this. After making these changes, try running X by typing startx on the command line. If all is well, X should start up without any problems. So far it has worked very well for me, however I haven't run it on battery for very long (see Power Management section). After successfully running X for a while, you can configure RedHat to boot into X by default. Just edit (as root) the /etc/inittab file and switch the default runlevel from 3 to 5.

Sound Support

RedHat installed the correct drivers by default, so there shouldn't be any problem getting sound to work. The built-in speakers are kind of weak, so you may have to press the volume up button on the laptop a few times to hear sound. Headphones or external speakers plugged into the headphone port work great.

Modem Support

The onboard modem in the Toshiba appears to be some variation of the Lucent/Agere chipset for winmodems. Unfortunately it seems to be the AMR variety, which is currently not supported by any Linux drivers. If anyone can get this modem working, please let me know via email . So far I have tried the ltmodem driver and a pctel driver with no success. See linmodems.org for the latest updates on possible drivers. From what I can tell, things don't look too promising. If you really need modem support under Linux, consider a PC Card modem that is supported by Linux. Just keep this in mind if you are considering purchasing this laptop.

Daemon Configuration

I usually turn off some of the daemons that I don't care about so they aren't consuming resources or causing security problems. As root, you can run ntsysv to see what services are currently on. I turned off autofs, gpm, isdn and sendmail since I won't be using those.

RedHat Updates

If you have access to a decent network connection I would strongly suggest downloading the latest package updates from RedHat. I used the RedHat Update Agent from my laptop since I have an ethernet connection hooked up to a DSL modem. You can also use FTP by going to ftp://updates.redhat.com/ and downloading the updated packages for manual install using rpm.

Travel Mouse

I plugged in my Targus optical travel mouse to the side USB port while in Windows XP. After rebooting to Linux, it was detected and kudzu (the hardware manager used by RedHat) appeared and allowed me to configure the mouse as a Generic 3 button mouse (USB). Upon starting X windows, all was well. The mouse worked fine, including all 3 buttons and the scroll wheel. Touchpad support was disabled, but that doesn't matter to me. There may also be a way to plug and unplug the mouse without have to manually reconfigure or reboot Linux, but I haven't investigated it yet. Send me email if you find a way to hot swap between the touchpad and an external mouse.

Power Management

RedHat 7.2 uses the apmd daemon to track power. This doesn't seem to work under Linux, it thinks that the machine is on AC power at all times (even when on only battery). Doing some research indicates that using ACPI might be the way to go for power managment. I haven't fully investigated this avenue, but if you are interested, see the ACPI4Linux home page and let me know if you have any success. What this means for now is that out of the box you won't be able to see how much power is left on your battery under Linux.

Future Investigations

In the future, I would like to try to get the DVD-ROM drive to work using some of the new DVD utilities available under Linux. Let me know if you have any success doing this (in other words, save me some effort :-). Aradia reports that VLC works (at least with XFree86 4.2) for playing DVDs. I am also looking forward to DPMS support being restored in the latest version of XFree86, which should be included in the next version of RedHat.

Conclusions

Installation was surprisingly smooth. The Toshiba is using some newer hardware, but RedHat came with everything needed to get up and going. The biggest disappointment was modem support, but Toshiba chose a winmodem that isn't currently supported by any Linux driver. It would be nice if some of the laptop/hardware manufacturers released Linux drivers for these software modems. Since I still have Windows XP installed I reboot if I need modem access, so this isn't a real big deal for me. All in all I am very happy with this laptop, the cost was excellent and it has a lot of high-end features. I would recommend this machine to anyone looking for a mid-range laptop that can run Windows and Linux. Feel free to email me with any success stories or updates to the information I have included here.

Last updated April 7, 2002

©
2002 Daniel Rogers